How to Draw a Crumpled Paper Step by Step TUTORIAL
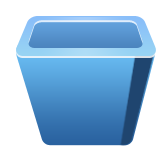
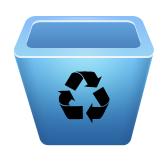
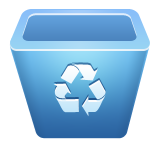
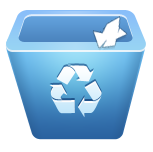
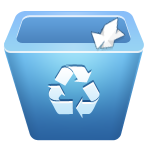
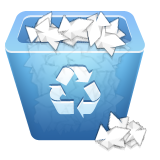
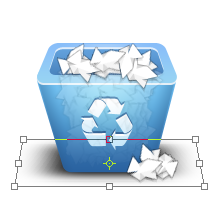
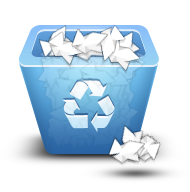
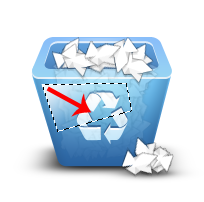
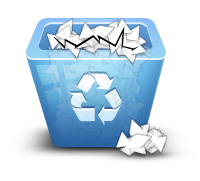
Preview
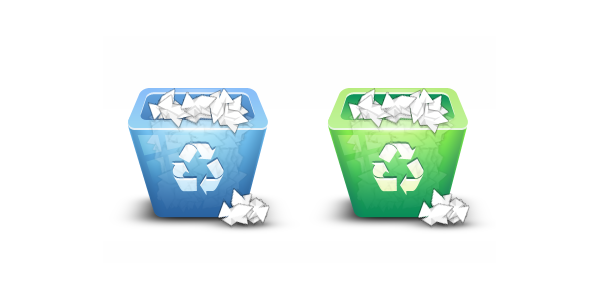
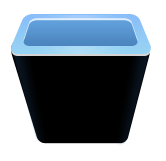
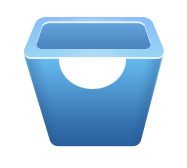
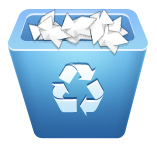
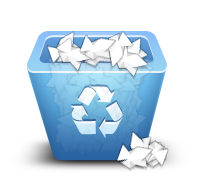
In this tutorial, nosotros volition exist making a blue-colored recycling bin icon, notwithstanding, you can experiment with unlike colors (shown on the right is a green version).
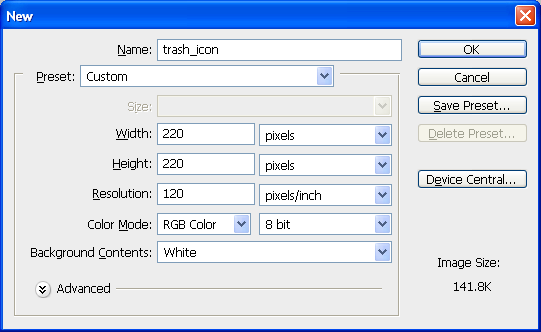
Footstep i: Prepare Up the New Photoshop Document
The most basic thing we need is a skillful canvas to work with. Create a new Photoshop document by choosing File > New or pressing Ctrl/Cmd + Due north whilst in Photoshop.
Step 2: Create the Acme Shape of the Recycling Bin
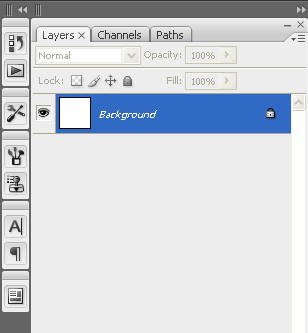
Create a new layer higher up the default Background layer by choosing Layer > New > Layer or past using the keyboard shortcut Ctrl/Cmd + Shift + N. Utilize the name, "top" for this layer.
Select the Rounded Rectangle Tool (U) and ready its Radius to 10px.

Go to Edit > Transform > Skew. Drag the top left and top correct transform controls inward.

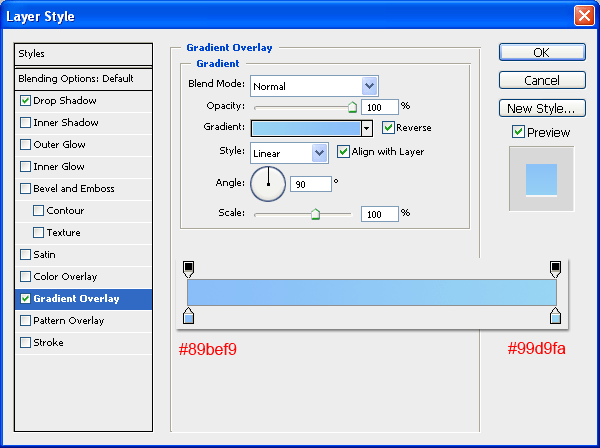
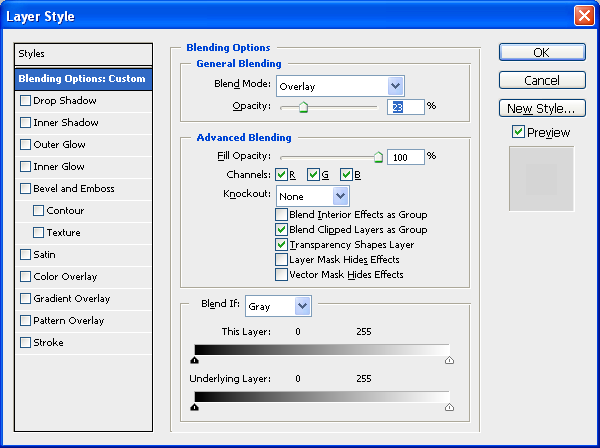
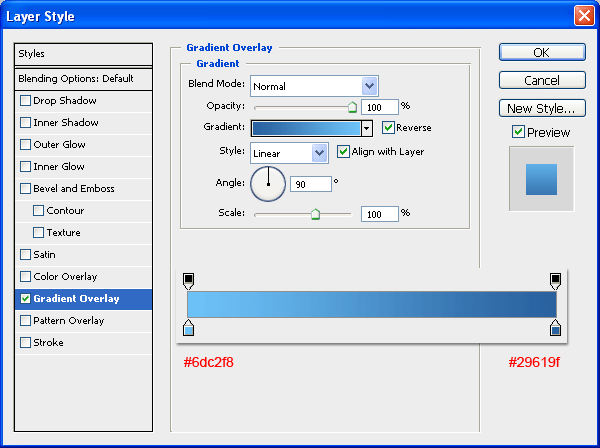
Double-click on the "top" layer in the Layers Panel to bring up the Layer Style dialog window.
Give the layer a Drop Shadow layer style with an fair drop shadow color (#fdfcfc).
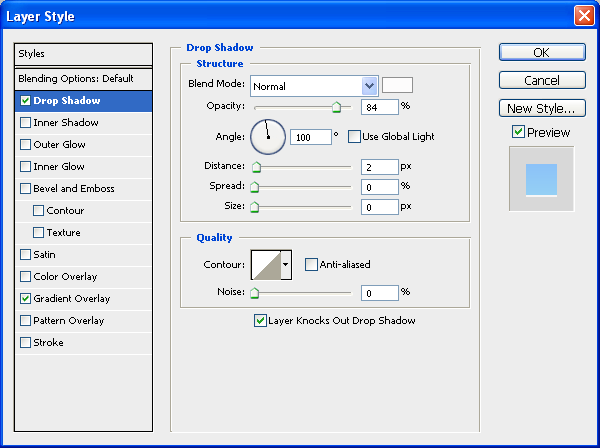
Also, give the "top" layer a Gradient Overlay going from a light blue (#89bef9) to a slightly lighter blue (#99d9fa), but you lot should also detect that the Opposite option is selected.
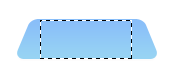
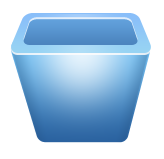
This is how our shape should look like:

Pace iii: Give the Acme of the Bin a Light Reflection
Make a new layer (we will proper noun it "height-shine"). Utilise the Rectangular Marquee Tool (M) from the Tools Panel to make a pick inside the "summit" shape.
Choose the Slope Tool (Thou) from the Tools Panel, having the gradient to go from white to transparent, and set the gradient way to Reflected Gradient.
Utilise the gradient starting from the center towards the right or left edge of your rectangular marquee selection.
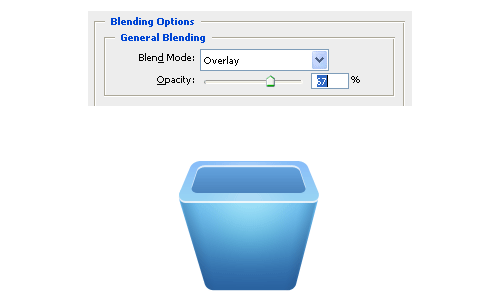
Switch the Blend Fashion of the "pinnacle-shine" layer to Overlay and Opacity to 23% and so that it doesn't appear as well prominent in our icon design.
The shine, as you lot tin can see from below, is very subtle but gives our icon a unique surface.

Step 4: Create the Illusion of Depth
We will at present go far wait like our recycling bin'southward opening is hollow. Create new shape layer at the middle of our "top" shape using the Rounded Rectangle Tool (U) and Edit > Transform > Skew as we've done earlier; rename this shape layer "top-depth" and so that nosotros are maintaining our Photoshop file'due south organization.
Tip: Alternatively, you can duplicate the "meridian" layer and resize the duplicated layer downwardly using Edit > Transform > Scale.

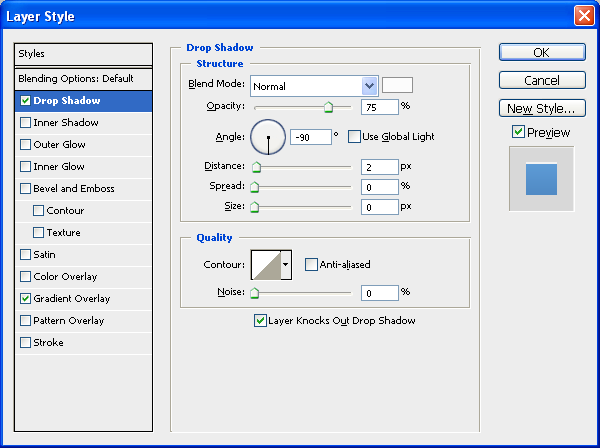
Give the new shape a Drop Shadow and a Gradient Overlay layer style.
Drop Shadow
The drop shadow color should be white (#ffffff).
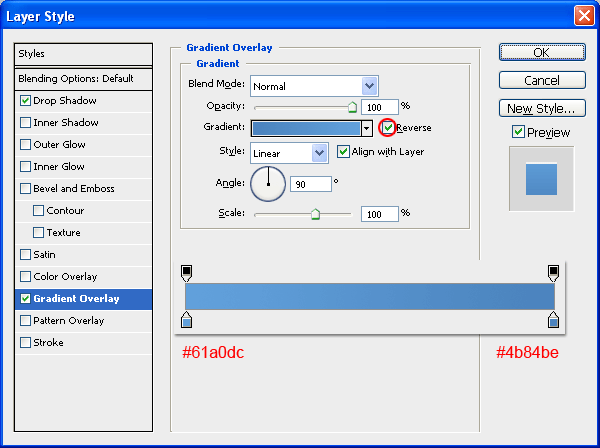
Gradient Overlay
Have the gradient get from a light blue (#61a0dc) to a slightly darker blue (#4b84be), but y'all should also discover that the Reverse selection is selected.
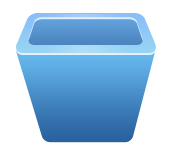
Equally you tin see from beneath, the layer styles give the top of our recycling bin an illusion that it is lower than the bigger rounded rectangle surrounding it.

Pace five: Organize Your Layers
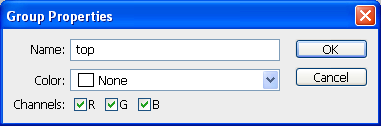
Housekeeping fourth dimension: Click on the Create new layer group icon ( it looks like a binder) at the lesser of the Layers Panel.
![]()
Drag every layer created until now — except the Background layer — into this group. Collapse this group by clicking on the pocket-size triangle icon only on the left of the folder thumbnail so that its more than compact in our Layers Console.
![]()
Name the layer group as "top".
Stride 6: Draw the Front Shape of the Recycling Bin
Now, in the Layers Console, click on the Background layer to position your work correctly in the layer stacking social club. Brand a shape for the front of the recycling bin (let us name this shape layer as "front").
You can use the same Rounded Rectangle Tool and Skew Transform process that nosotros used for the top of the recycling bin, simply this fourth dimension, when you are skewing information technology, y'all will pull in the lesser transform controls towards the middle.
Stride vii: Give the Front of the Recycling Bin Some Colour
To give the forepart of our recycling bin its color, we will use a Gradient Overlay layer style.
The front end of our bin should now have consistent coloring with its pinnacle.
Stride viii: Shade the Right Edge of the Recycling Bin
Make a new shape (yous can name this shape layer as "side-shade") towards the correct of the icon.
Color the shade accordingly using a Color Overlay layer style, using a darker blue color (#1f456f).

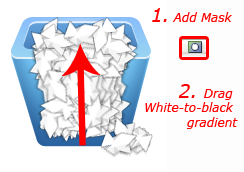
With the "side-shade" layer selected in the Layers Panel, give the layer a layer mask by clicking on the Add layer mask icon at the bottom of the panel.
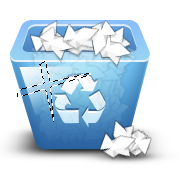
If done correctly, you'll see that the "side-shade" layer will look similar the following image.
![]()
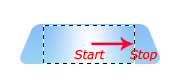
Now take the Gradient Tool (G) and prepare its options so that the gradient goes from white to blackness and the gradient style is fix to Linear Slope. Apply the gradient as shown beneath (indicated by the cherry-red arrow).
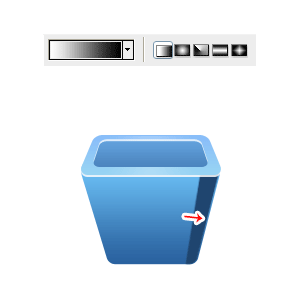
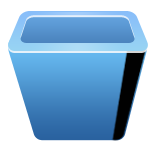
This should outcome in giving the right side of the recycling bin an result of being curved.
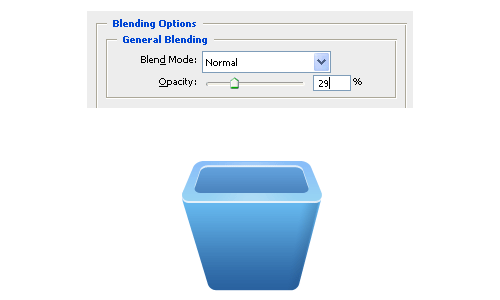
Reduce the prominence of the shading by lowering the layer's Opacity to 29%.
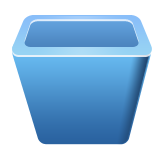
Stride 9: Shade the Left Edge of the Recycling Bin
Indistinguishable the "side-shade" layer by pressing Ctrl/Cmd + J while the layer is the active layer in the Layers Panel or by choosing Layer > Duplicate Layer in the main menu.
Flip the duplicated layer horizontally by going to Edit > Transform > Flip Horizontal.

Move the duplicated shading to the leftmost border using the Move Tool (V).

Step 10: Create Low-cal Reflections
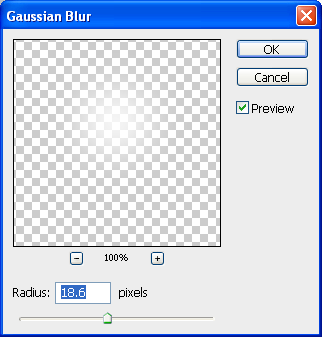
Let usa give our icon a radial light reflection to make its surface even more interesting. Create a new layer (you can name it "front-light"), and in this newly-created layer, you can use the Elliptical Marquee Tool (M) and Fill up command (Ctrl/Cmd + F5) to make a white one-half-circle shape located at the middle of our bin.
Soften the edges of the half-circumvolve by giving its layer a Gaussian Blur; do this past choosing Filter > Blur > Gaussian Blur and setting the Radius option of the blur filter to almost xviii.6px.
Equally you can see below, nosotros volition demand to right the light reflection so that it doesn't keep the brim.
Remove the excess light reflections at the elevation by selecting them with the Rectangular Marquee Tool and pressing Delete to remove the selected expanse.

Allow the light reflection alloy better by switching the layer's Blend Mode to Overlay and lowering the Opacity to nearly 67%.
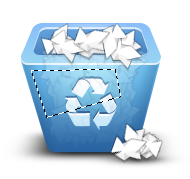
Step 11: Add the Recycling Symbol
Choice the Custom Shape Tool (U) from the Tools Panel. For its Shape option, notice "Recycle two" which comes with Photoshop CS versions by default (it is in the "Symbol" gear up of custom shapes).
Draw the custom shape at the middle of our recycling bin.
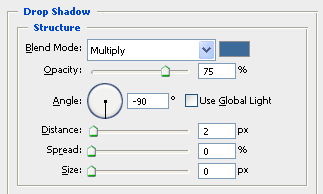
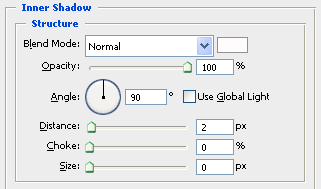
Step 12: Manner the Recycling Symbol
Style the recycling shape layer by giving it a drop shadow, inner shadow, and slope overlay layer styles.
Drib Shadow
Prepare the drop shadow color to a blue (#3c6a99).
Inner Shadow
The inner shadow colour should be white (#ffffff).
Gradient Overlay
Finally, the gradient overlay colors should be from babe blue (#bee4f9) to white (#ffffff).
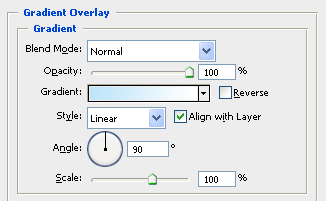

The three layer styles gives the symbol some harmony with the rest of our icon's design.
Before moving on, allow us organize our work by grouping all the "front" layers into a layer group chosen "front".
The "front" layer grouping should be betwixt the Background layer and the "top" layer group.
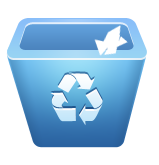
Step thirteen: Draw a Crumpled Piece of Paper Shape
We will now draw a crumpled piece of paper that has been tossed into our recycling bin. Above the "top" layer group, create a new layer (permit us name this layer every bit "paper").
On this new layer, you can utilize the Polygonal Lasso Tool, the Pen Tool, or any of your favorite freehand drawing tools to create a random white-colored shape, every bit shown below.
Step 14: Mode the Crumpled Paper Shape
Give the piece of paper a Drop Shadow layer manner and Stroke layer mode.
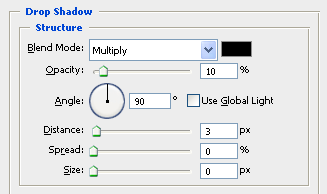
Drop Shadow
The driblet shadow color should be black (#000000) and its Opacity lowered to around 10%.
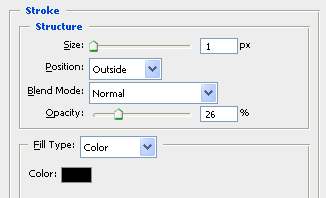
Stroke
Respectively, the stroke color should as well be black (#000000).
The layer styles requite our piece of paper some base definitions.
Step 15: Draw Details on the Crumpled Newspaper Shape
To add together creases to the paper, create a new layer (name it "paper-shade1") and draw black shapes along some of its edges.
Lower the opacity of the "newspaper-shade1" layer to around 14%. This should result in giving the piece of paper some subtle depth and definitions.
To add more than creases, just create a new layer (let us name this one "newspaper-shade2") and draw more blackness shapes.
Reduce the Opacity to effectually iv%. Adding the crease shades on dissimilar layers and lowering the opacity to a some other value gives our details random nuances that brand the slice of paper wait more realistic.
Step 16: Make More Pieces of Paper
Kickoff, permit us organize our PSD by making a new layer group for our crumpled pieces of paper. We tin call this group something intuitive like "paper". Drag all layers associated to the piece of paper nosotros just fabricated into this new layer group.
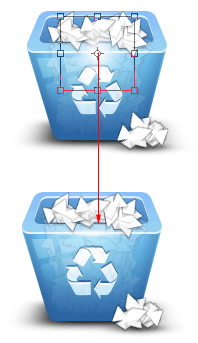
Next, indistinguishable this layer group (Layer > Duplicate Group) to make another piece of paper.
Move the new piece of paper away from the first one using the Movement Tool (Five).
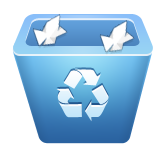
Make another piece of paper using the aforementioned technique.
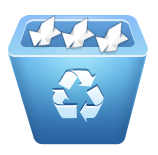
Add variance to the pieces of paper so that they don't expect identical using the Costless Transform command (Edit > Free Transform). Y'all can rotate them, modify their sizes, and then forth.
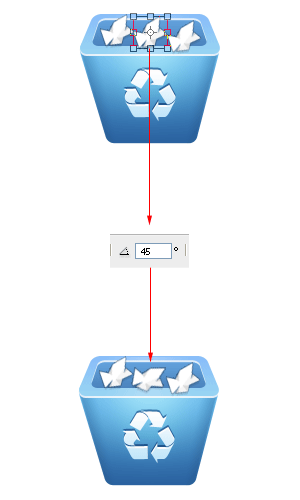
We will change the angle of the eye piece of paper to 45o.
Select its layer grouping in the Layers Console, choose Edit > Transform > Rotate, and in the Options Bar, gear up the Rotate pick to 45o.
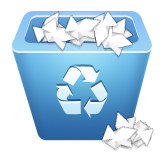
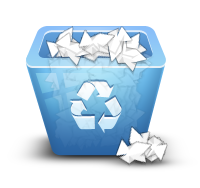
Create equally many pieces of paper equally you want, experiment with angles, sizes, and layer stacking guild. The goal is to make the pieces of crumpled paper varied so that our icon mimics a real recycling bin.
Y'all can also add pieces of newspaper outside of the recycling bin to brand it await full.
Step 17: Brand our Recycling Bin Expect Semitransparent
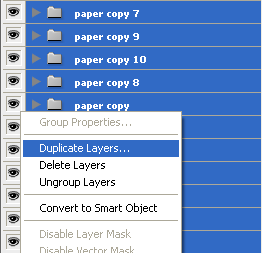
Let's brand our bin wait as if we can run into within information technology slightly. If y'all don't want to do this, that is fine — consider this as an optional step. Start by selecting all the "paper" layer groups — except the pieces of paper that are laying on the floor — in the Layers Console.
Indistinguishable them by right-clicking in the Layers Panel and choosing Indistinguishable Layers from the contextual carte du jour that appears.
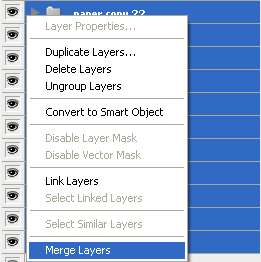
Merge the duplicated layers by right-clicking in the Layers Panel once again and choosing Merge Layers.
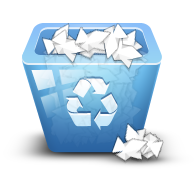
Duplicate, transform, and and then forth and so that y'all end up with something like the paradigm beneath.
We want to make it look like our bin is filled to the brim.
Merge these layers (select them in the Layers Panel and press Ctrl/Cmd + E) and proper noun the merged layer equally "translucent-holding".
Add together a layer mask on the "translucent-property" layer, then employ the Gradient Tool to create a black to white gradient on the layer mask.
Doing and so will fade the layer towards the lesser of our recycling bin.
Pace 18: Add Shadows to the Pieces of Paper
We need to add some additional shadows to the pieces of paper. Create a new layer chosen "extra-shadow", and on this new layer, describe blackness shapes on the papers' edges.
Set up the Opacity of the layer to x% to soften the drib shadow.
Perform some organizational tasks by making a new layer grouping called "papers" and dragging the corresponding layers and layer groups inside of it.
Step 19: Give the Recycling Bin a Shadow at the Lesser
Let us create a shadow being casted on the floor past the recycling bin. Create a new layer (name it "main-shadow") but above the Background layer.
Employ the Rounded Rectangle Tool (U) to depict a rounded corner square backside the bin.
Apply a Gaussian Blur filter to soften the edges of the rounded corner square, using a Radius betwixt 18-19px.
Using the Free Transform command (Ctrl/Cmd + T) like before, squeeze this shape and so that it looks like the following image.
Use Skew Transform so that its angle is consequent with the Recycling Bin'due south shape.
Step twenty: Paint Shadows for the Pieces of Newspaper on the Floor
We should add some shadows on the pieces of paper that are on the flooring and then that our icon'south lighting is accurate and consistent. First, create a new layer (name it "paper-shadow") above the recycling bin's shadow layer (which we had named "main-shadow").
Use the Brush Tool (B) with a soft black brush tip and Master Diameter that is around 65px.
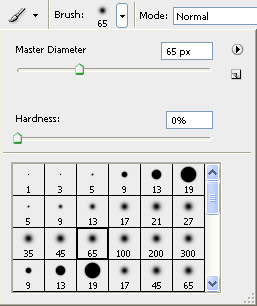
Click one time on your sheet to produce a circular brush stroke.
Employ Free Transform to squeeze it down and arrive look similar the shadow of the pieces of newspaper on the floor. Position information technology at the bottom of the pieces of paper using the Motion Tool (V).
Duplicate the "paper-shadow" layer and scale it down using Free Transform. Position it beneath the other slice of paper using the Move Tool (V). Having two layers for the shadow makes the depth of our piece as authentic equally possible.

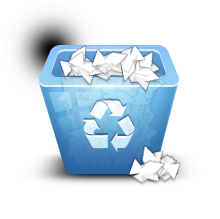
Step 21: Add a Window Lite Reflection
Let's give our work some subtle details. We are coming to the final steps of our icon design.
First, we'll brand a calorie-free reflection on the superlative left corner.
Create a new layer named "reflection". Use the Polygonal Lasso Tool (L) to draw an uneven polygonal choice. Note that yous want this new layer to be at the very peak of the layer stacking order.
Adjacent, apply a white to transparent gradient using the Slope Tool (G).
Allow'south say that the lite source is coming through a window pane. Make a selection that looks like a cantankerous (using Polygonal Lasso Tool), representing the window's frame.
So, just hit Delete to remove parts of the lite reflection underneath the cross option.
Alter the Blend Way of the "reflection" layer to Overlay and also lower the Opacity to effectually 35%.
Step 22: Add together More than Creases to the Pieces of Paper
We should give our pieces of paper some more than details past adding creases to them. Create a new layer (let u.s.a. name this layer "crumples"). On the new layer, describe black shapes around the edges as shown beneath.
Reduce the opacity of this layer to around 10%. Doing this gives our pieces of paper some subtle definitions.
Step 23: Add a Light Reflection at the Recycling Bin's Edge
To end our work, nosotros will be adding a calorie-free reflection at the edge of the bin's opening. This process will give our surface an fifty-fifty more than interesting design element, besides as describe the viewer's eyes towards middle of the icon. Create a new layer (we can call this layer "add together-shine").
Use the Brush Tool (B) with a white, soft castor tip sized at about 45px. Click once in the center (towards the meridian) to pigment in the lite reflection.
Set the Opacity of this layer to 60%.
Tutorial Summary
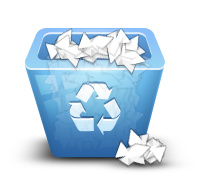
You're done! In this tutorial, we used fundamental Photoshop tools such equally the Rounded Rectangle Tool, the Custom Shape Tool and the Gradient Tool, as well equally basic commands such every bit Free Transform and Skew Transform to draw a recycling bin icon from scratch.
You tin modify your layer styles to make the color of your recycling bin different.
Below, y'all can encounter that I modified the color to dark-green.
Download Source Files
- recyling_bin_icon (ZIP, 0.51 MB)
DOWNLOAD HERE
How to Draw a Crumpled Paper Step by Step TUTORIAL
Posted by: rosariofict1958.blogspot.com

Comments
Post a Comment